Gettin' 'thanes Done
This weekend picked up where we left off with even more ceiling excitement!
Last weekend saw the ceiling's tongue and groove boards getting a coat of stain. Here's a shot of some boards before staining (left) next to some after their trip to the Board Salon (right).
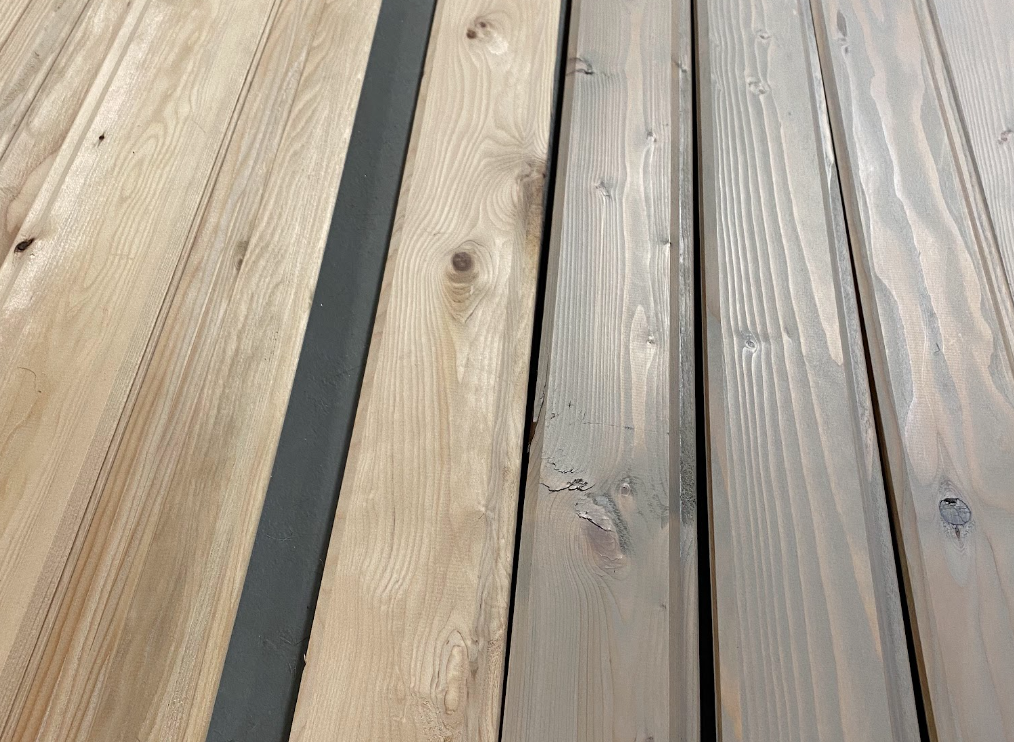
We chose this color because we wanted something that was interesting to look at but wouldn't make the ceiling feel dark, heavy or oppressive. The boards have a lot of character in the form of knots, interesting grain situations and modest splitting (translation: they're cheap) so we're just leaning into that with a rustic look. Cabin vibes.
I followed the stain up with applying two coats of urethane, since I had the day off Friday for the holiday. It really did take basically all day--each coat was about 2.5 hours of patient brushing. Why do the staining and finish coat before installation? I've painted enough ceilings to know that I don't want to do that if I can avoid it. Much easier to do it with gravity pointing in the most helpful direction.
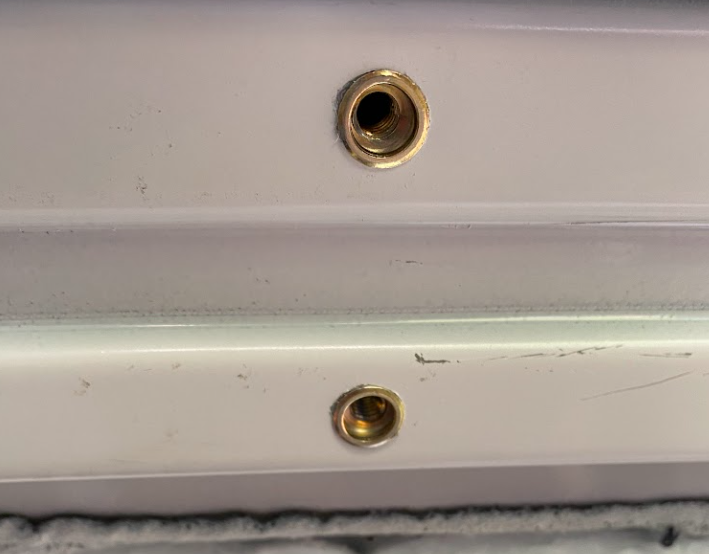
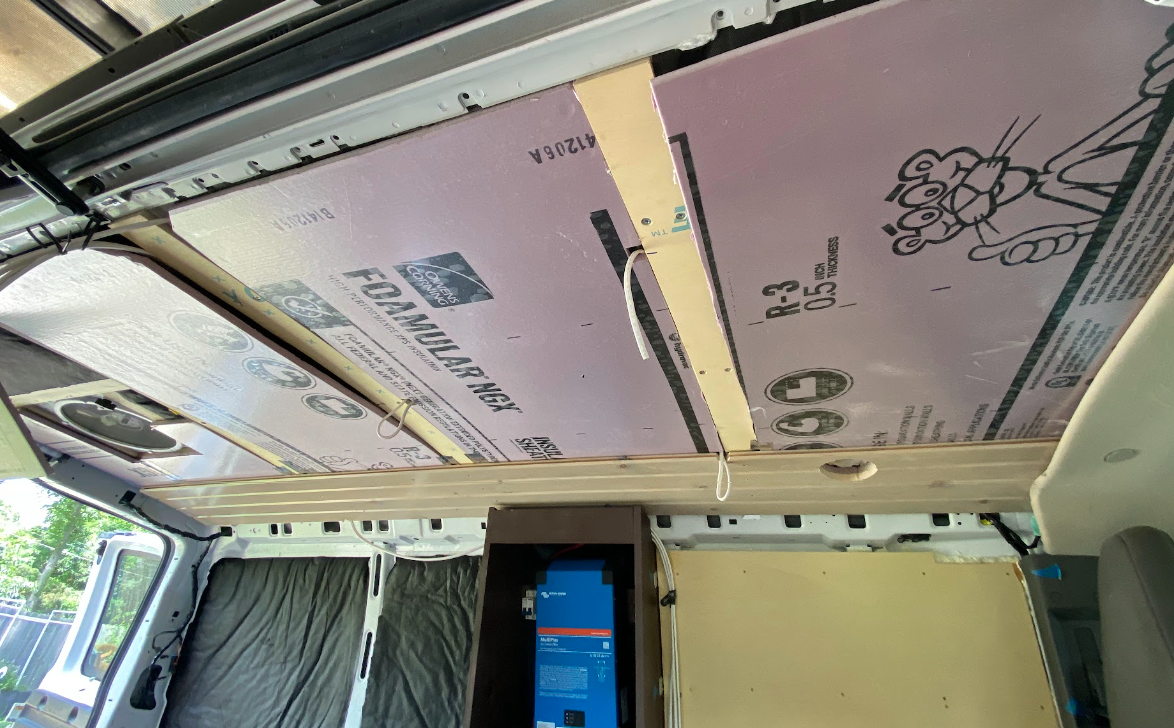
With the ceiling boards ready, we needed to prepare the interior of the van's roof so that the boards can be attached. We started by enlarging some existing holes in the roof support cross-beams, and then inserting rivet nuts into the holes. These are threaded inserts that you squish onto a sheet metal surface to create a stable place to bolt into. Here's what they look like:
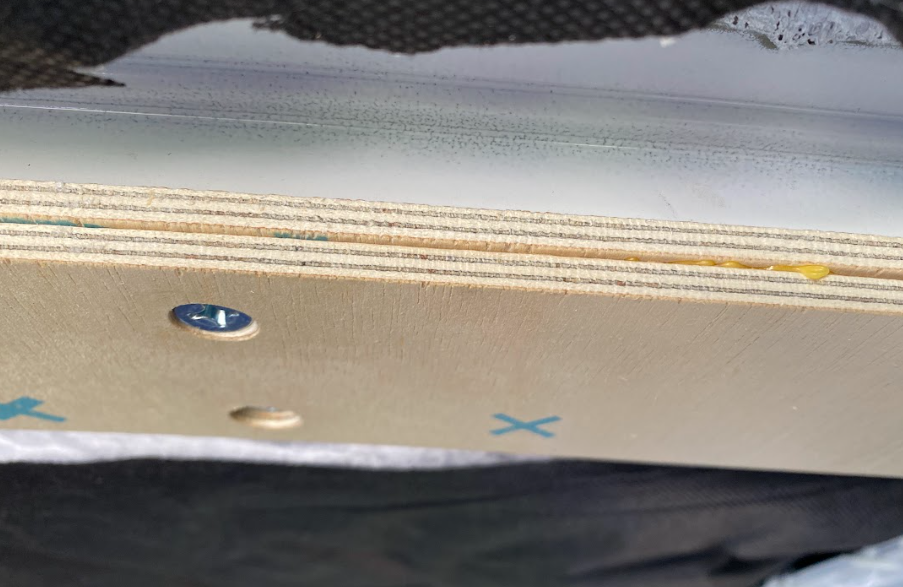
We used them to attach two strips of thin plywood to each cross-beam. Pairing the two thinner pieces helps them follow the curve of the roof. There's glue between the two pieces as well, to meld them into one stronger piece.
With that done, we cut pieces of foam insulation to fit between them, similar to what we did last weekend with the first bit of wall construction. These have a few notches cut out of them so wires can enter and exit the ceiling cavity behind them; we've run wires for ceiling lights and other electrical needs behind the pink foam.
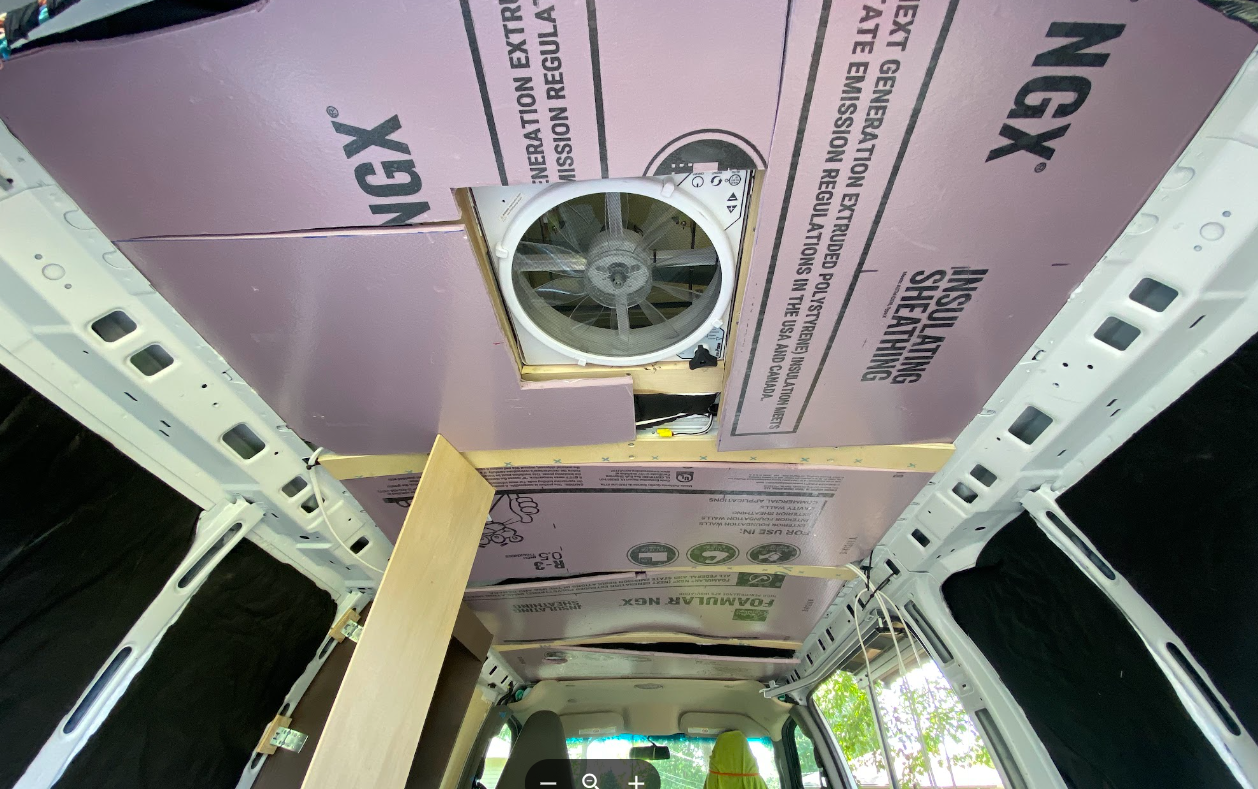
Foam chopping accomplished, we started screwing our ceiling boards into place! Like the wall, the ceiling has foil tape along the seams between the foam and the wooden "studs," but we're applying it in pieces as we work across so that the pesky gravity situation doesn't just pull it all down again before we can get it supported by the tongue and groove boards. Here's what the beginning of the process looked like:
This part is pretty straightforward! We had to cut a hole in the boards that run under our kitchen ceiling vent, and also notch the boards out where we will install light fixtures later, but nothing super frustrating here. Very satisfying, in fact! Here's where we left off because it's July and we ran out of "it's okay to be outside right now" hours.
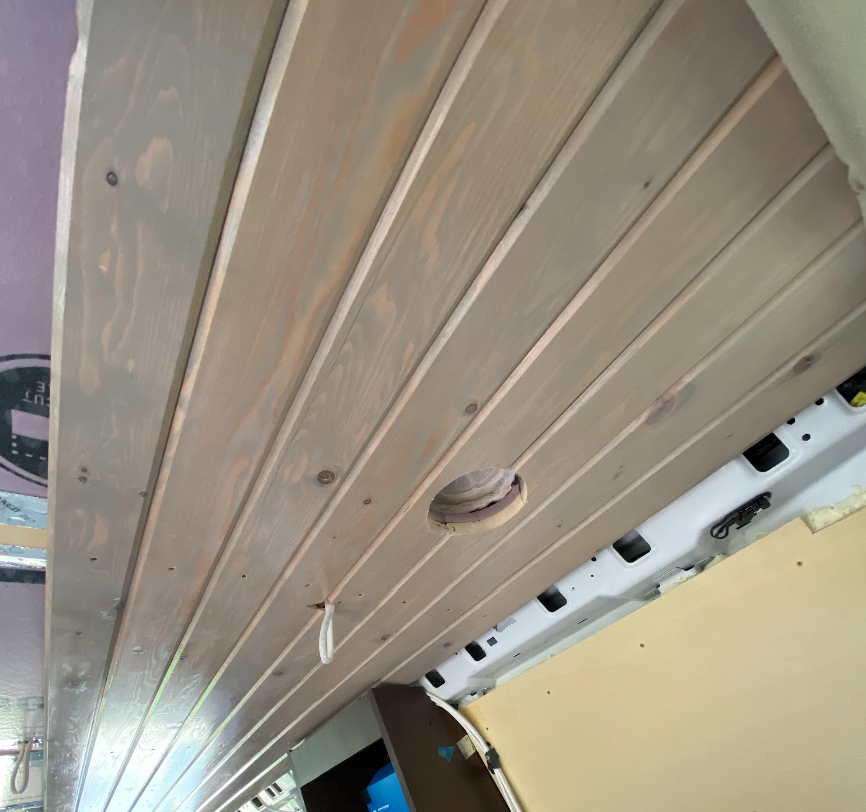
I'm very pleased with this! The ceiling is turning out super pretty and more or less how I imagined it. I foresee no complaints about staring up at this on future camping mornings.