Electrical 1: Building a Bay for Blue Boxes
By far the most expensive, involved, and lengthy part of this project is the electrical system. It will be able to take in power from the solar panels, from being plugged in to a campground hookup, and from the alternator while the engine is running. That power will then be stored in two large batteries before being used for a variety of devices on both AC and DC circuits. This involves a lot of design and planning, and also a lot of pricey equipment. I'm learning a lot, though!
So... work on the electrical system began with the construction of a cabinet-box-thing to hold most of the equipment on the side of the van. The first step was creating a cardboard template of the curve on the inside of the van, then transferring that onto some 1x12 boards and cutting them out. Then: the first of many test fits!
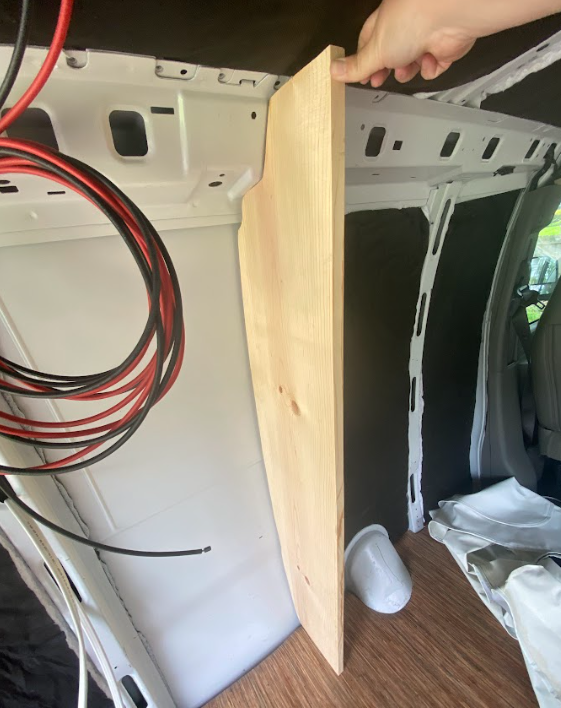
Looks good so far.
The biggest piece of equipment going in here needs to be mounted at the top of the electrical bay. It also weighs a bit more than 40 pounds. So, the first problem to solve (before we cut the side pieces, actually) was supporting that weight along a van wall that curves in toward the ceiling. That much weight needs a pretty sturdy mounting surface, but I didn't want to lose the amount of space that would disappear behind a flat, sturdy board if I installed one across the entire vertical distance. Space is at a premium here.
Our solution involves creating most of the strength through the fairly thick side boards of this cabinet thing, and then running some mounting boards horizontally between those sturdy sides, right up against the wall of the van and following the contours of the interior. So, we cut notches out of the side boards so we could fit the mounting pieces into those notches.
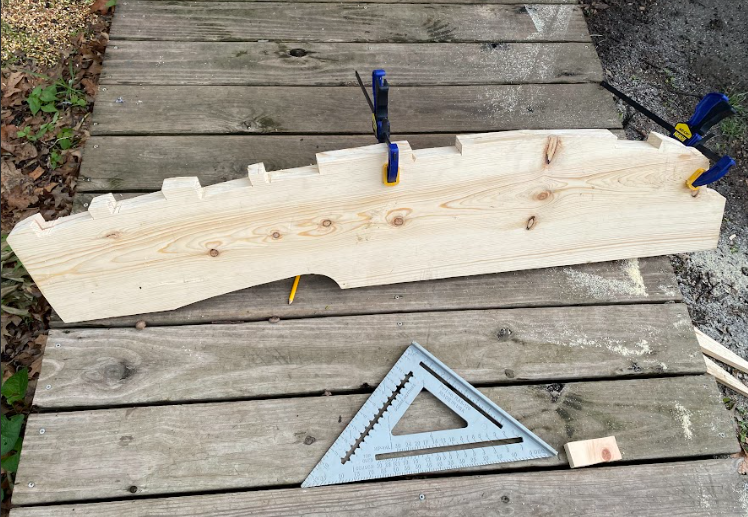
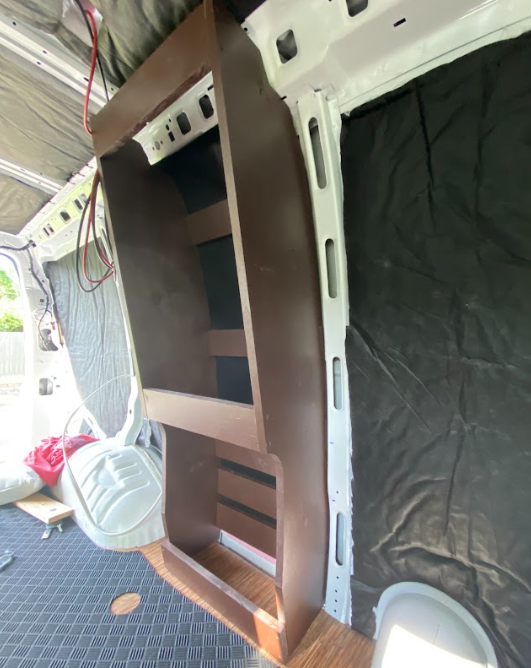
You may or may not be able to see it, but the flat front of our boards is not perpendicular to the floor. The front of this cabinet will be sort of tilted forward, to allow adequate space for the equipment all the way to the top while also allowing for the width of our bed at the bottom. To this end, we also cut a bit out of the front of the cabinet at the bottom to slot the edge of the bed into.
Once the sides were cut, it was time to put in all those mounting pieces!
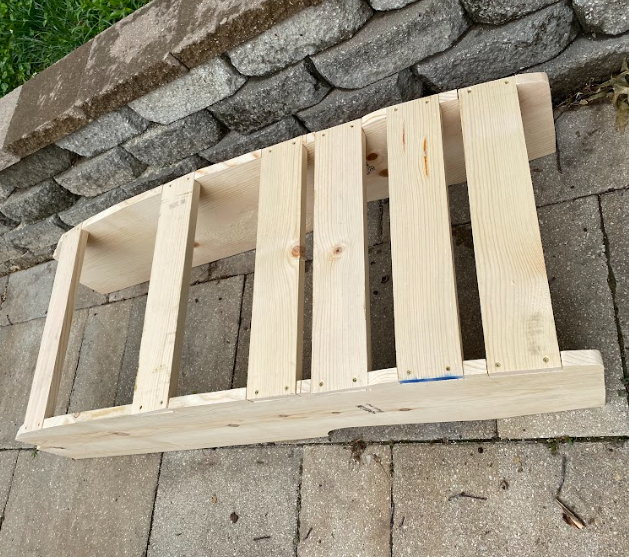
Niiiiiiice. Coming along quite satisfyingly at this point. Time for another test fit!
Excellent. After the test fit, we also added some cross members to the front of the frame for stability and to allow a place to mount a door or some other front for the cabinet.
At this point, I painted the frame using some various brown spray paints we had left over in our basement. The purpose of this is mostly protection, so I wasn't too worried about how it turned out. I just want the wood to be less amenable to water. There's a good chance that all the visible surfaces of this cabinet will be covered by something else by the time the van is done.
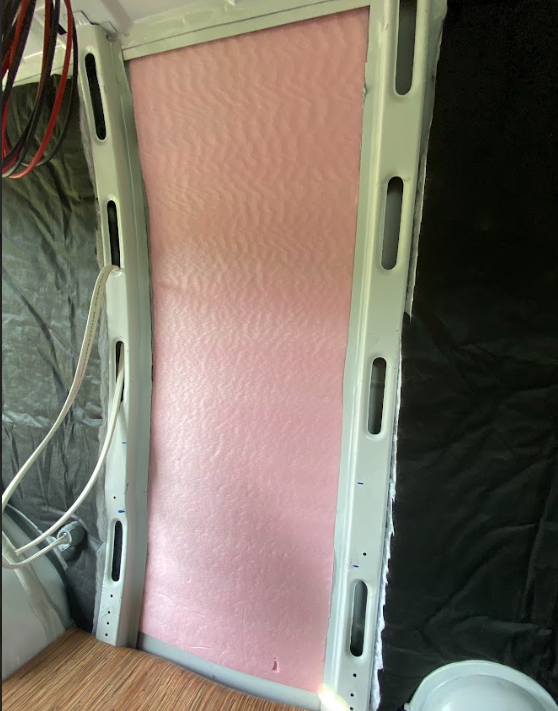
Before sticking the frame back in the van, I cut a piece of 1/4 inch foam insulation board and placed it into the bay so it will sit behind the cabinet.
We also tacked a roll of the squishy, plasticky stuff you can buy for lining the shelves of your pantry to the back of the cabinet, for a bit more insulation/coverage and also for looks. Back in she goes for another test fit!
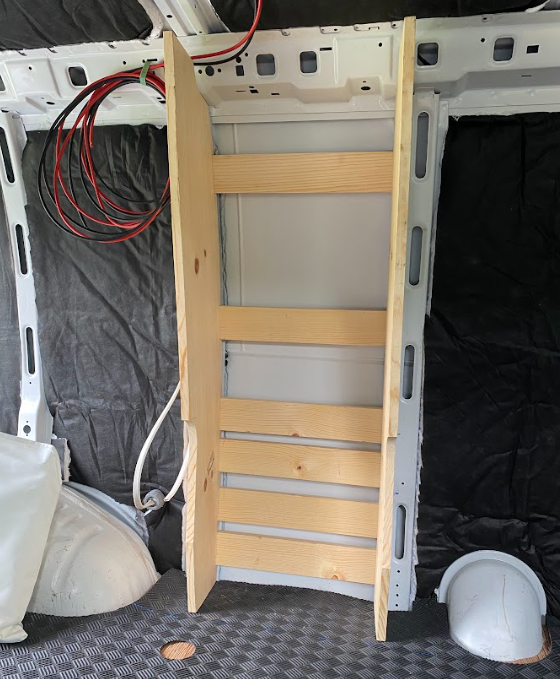
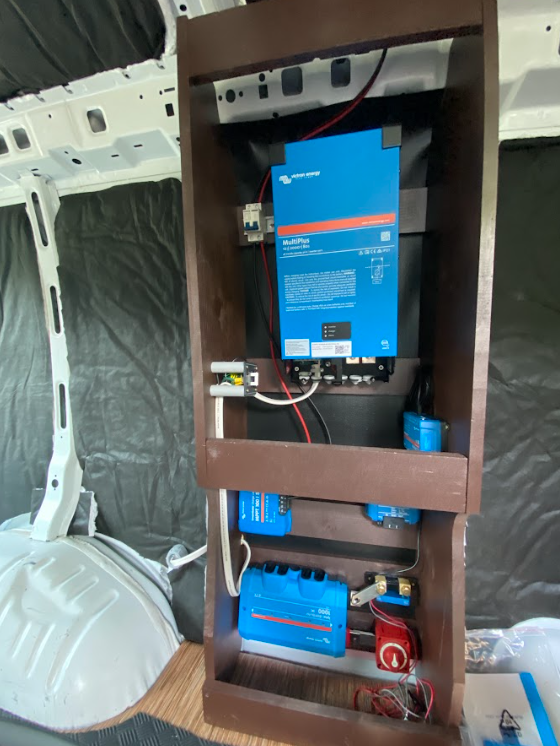
Next we attached the frame to the vertical ribs on either side of the cabinet, using some angle brackets and the hardware that had previously attached the wooden rails to the sides of the cargo area. I didn't do a great job of capturing that part, but here's a picture of where we ended the weekend, after screwing some of our equipment into the frame:
We still have a couple devices to install, and then we need to run a whole heck of a lot more wire. Stay tuned for more exciting (not very) high-voltage action!